


Artful Joints: Roll 6 Unusual Pre-Rolls Including the Tulip Joint
Posted by DaySavers Team on Mar 11th 2025
So you’ve mastered the art of rolling a joint. You’ve perfected making your own infused pre-rolls and joints. You’ve even tried rolling your own cross joint, even though it’s way easier to just pack up a Smoke Temple Pre-Rolled Cross Cone.
So what else can you roll up to impress your friends?
Never fear, your friends at DaySavers have been scouring the internet searching for the Next Great Doobie you can roll up to make an impression at your next session. We’ve skipped the basic “add a third rolling paper” type joints (though please, feel free to find new and fun ways to arrange your papers before rolling and let us know what sort of bombers you come up with) to focus on some of the more unique-looking designs we’ve found.
So grab your rolling papers and rolling tray and let’s get to it.
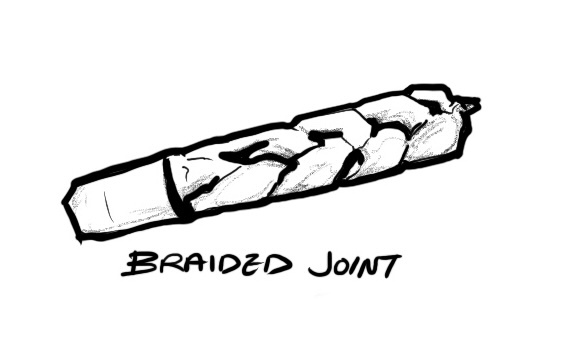
The Braided Joint
Let’s start with a simple, but eye-catching joint that makes an impact well beyond the work involved: the Braided Joint. Put simply, a braided joint is just three slim jays that have been intertwined so they can all be smoked at one time. This takes a bit of patience and practice, but in the end, it’ll be worth it when you bust one out at your next session.
For this one, we recommend using king size rolling papers, as it will make the braiding easier at the end. You are also going to need an extra bit of glue strip or paper to hold the end together once you’ve braided and will want to have that ready to go ahead of time.
First, roll three thin joints. Try to make them as similar as possible and not too tight. Remember, these are going to work together so each individual jay does not need to be a bomber and, in fact, will only make it more difficult to braid together if they are. You can use a filter or crutch for these or not, it’s your choice, though it takes some practice to get the crutch as thin as you are going to want to make the braiding easier.
Next, braid your three joints together. Now, this is admittedly easier said than done, but it can be done. It may, however, take some practice, so don’t get discouraged.
Start by placing all three joints parallel to each other and gently press the top together. Next, bring the rightmost joint over the middle one, then the leftmost joint over the new middle, then grab the new rightmost joint and just repeat until you get to the end.
Finally, use that extra bit of rolling paper or glue strip to wrap around the end to hold the whole thing together. Voila; a braided joint.
For a fun twist (see what we did there), we suggest using two different types of rolling paper (a white and a natural brown, for example). When you start braiding, put the odd paper out in the middle. It won’t change your joint at all, but it will give it a unique look.
The Tulip Joint
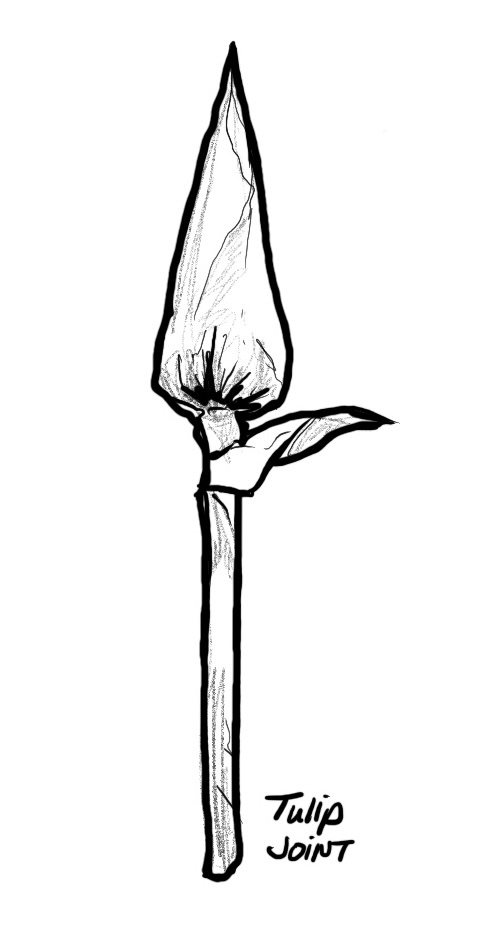
Next up, let’s roll one that’s going to get people excited: the Tulip Joint.
Basically, a tulip joint consists of a thin “stem” with a conical "bulb" attached to the top that makes it look like a tulip. You can make the stem with either.
For this one you are going to need at least two rolling papers to create the bulb and potentially another for the stem, plus a little extra glue line or paper to seal it all together. For this one, we recommend the 1 ¼ size, especially to create the bulb.
First, you have to decide just how serious a joint you want to smoke. When rolling a tulip joint, the stem can either be an extended crutch, or a full joint in its own right. The former packs all of your weed into the bulb, while the latter reserves a full doobie for post-bulb smoking. Which may be a bit much for some...
So first, either roll up a large crutch using cardstock (or an index card) or roll up a joint. Great. Now set that aside. That's your stem.
Next, take two 1 ¼ size papers and stick them together to form a square with the glue strip up along one edge. Try to make this as close to a square as you can to make later steps easier.
Then, take the non-glued side and fold it across the diagonal, leaving the glue strip uncovered. Wet the glue strip and fold it over on top of the side you just folded to create a triangle. Now you should be able to open the top and form a cone out of the folded and sealed papers.
Start filling your cone from the top, being sure to pack it tight. You don’t want air bubbles in here that can form hot spots and lead to canoeing or running. When filled, gently crimp together the open end, leaving a wide enough opening for your joint or crutch to fit in. A pencil, tamping stick or similar-sized object can be used here to help create the right size opening on your bulb.
Stuff the non-crutch end of your joint or your card stock crutch into the open end of your bulb using the crimped area as a guide. Don’t worry about matching sizes, the bulb should be fatter than the stem.
Now grab that extra bit of glue-lined rolling you set aside earlier and wrap it around the spot where the stem and bulb come together in order to seal both parts together.
You can either tie in the excess paper from the bulb, or flip it up, to create the "leaves" around the base of your tulip bulb.
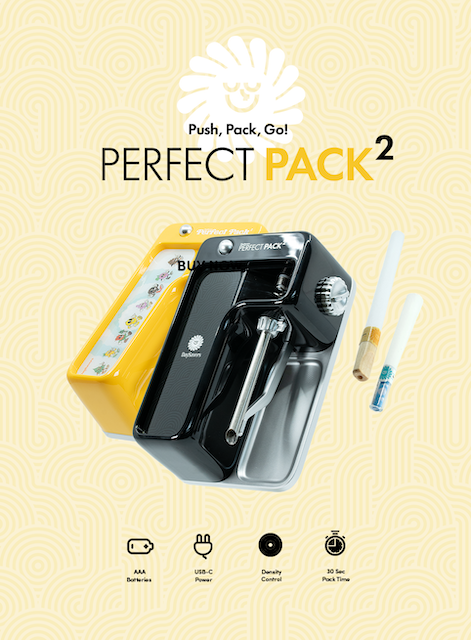
To make things easier, you can always grab a DaySavers pre-rolled tube and use that as you stem. To save further time, you can even pack it with a Perfect Pack Machine to get to the fun parts quicker.
Now just light the pointed end of your bulb and enjoy!
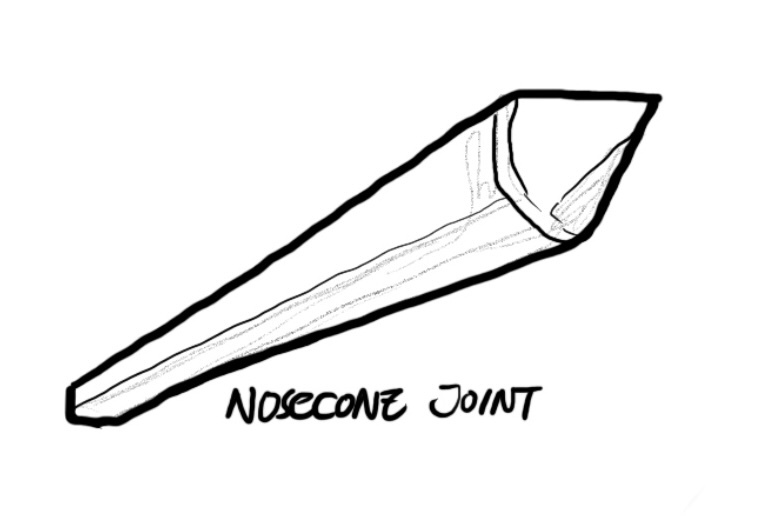
The Nosecone Joint
So flowers aren’t your thing, but you still want something that packs a tulip joint-like punch? Check out the Nosecone joint, which uses a similar process, but creates a fatter, conical joint with a warhead top that is undoubtedly ready to do some damage.
Start by rolling up a conical joint. If you roll cones, they can work here. However, for the full effect, you’ll want to use two leaves of rolling paper with the second set at a 45-degree angle off the end of the first, so it looks something like a hockey stick. As you roll this, it will leave a wider opening at the top.
Fill it as far as you like, but remember that you will be capping this bomber with a nosecone, so you don’t need to pack it all the way to the top. This one should not be bulbous, like the tulip. The goal is to line up the openings.
Next, create a cone-shaped section like the tulip. Put two rolling papers together to form a square. Grab a non-glue-lined corner and fold it diagonally with the edge along the glue line, while leaving enough room to fold the glue over to seal the triangle. This creates your cone.
Next, fill your cone up to where the diameter matches the cone you rolled. Trim off excess paper from both and place the open ends of each part together. Use an extra paper’s gum line to seal the two parts together.
Again, unlike the Tulip cone, which wants a fat bulb at the top, the key to the nosecone is making sure the top of the cone joint and the open end of the nosecones itself are as close to the same size as possible.
Now just light the point and it’s time for liftoff.
For a simpler way to make a Nose Cone Joint, skip the cone-rolling step and just grab a DaySavers pre-rolled cone While this does not create as fat a Nosecone Joint as rolling it yourself, it was save you a lot of time and still looks cool as hell.

The Plumber’s Joint
When rolled correctly, the Plumber’s Joint will have a hole down the middle for airflow purposes, bringing smoother hits while still packing a heavy punch. There are two main ways to achieve this: either by using an extra rolling paper inside to help create the tunnel, or not. We’re going to say this is a personal choice, but that it also depends on the quality of weed you are using.
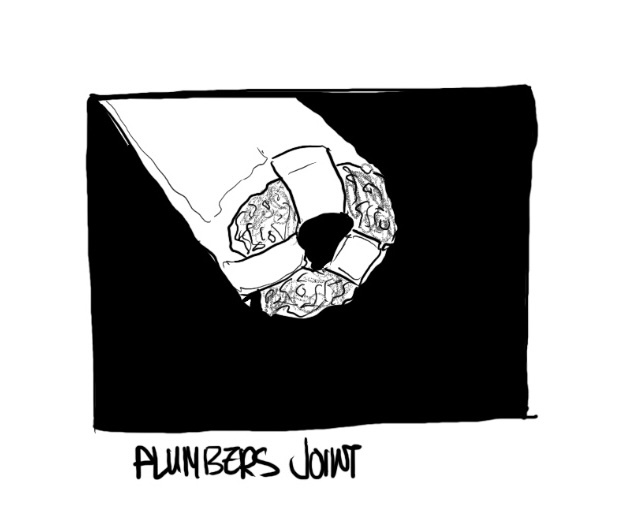
What we mean is that the stickier and higher quality your pot, the easier it is to create one of these without the extra paper because the better pot will hold its shape and keep that hole in the center better than dryer, more crumbly weed.
For this one, though, you are going to need a bamboo skewer or something similar.
Let’s do it the easier way first. This works best with stickier weed.
Pull out a rolling paper and add your flower like you normally would, but only add about half. Give a quick roll between your fingers to help shape it, but don’t press too tight. Next, place your skewer in the center of the pile and add the rest of your flower. Now give a good roll between your fingers.
The goal here is to keep the skewer in about the middle of your roll.
Seal your joint like normal. Then, give your skewer a little twist and slowly pull it out. This should leave you with a tunnel down the middle of your joint that helps increase airflow for a better burn and smoother hit.
But not all flower will hold its shape when you pull the skewer out. But don’t worry, we’ve got the technique for that too.
First, wrap a rolling paper backwards around the skewer. Give the glue line a lick so that it creates a tube around the skewer using the least amount of paper possible. Then, take your lighter and light the remaining rolling paper. It should burn all of the non-licked, non-glued paper. This will leave you with a small rolling paper pipe wrapped around your skewer.
Now repeat the rolling process above; put half your flower in another paper, give it a quick roll, add the skewer and paper pipe, then then the rest of your flower, roll tight and seal. Now, when you pull the skewer out, you’ll be able to see the rolling paper pipe through your joint.
Just twist your non-crutch end to close it or use a few glue strips to add secure your papers together, then fire it up.
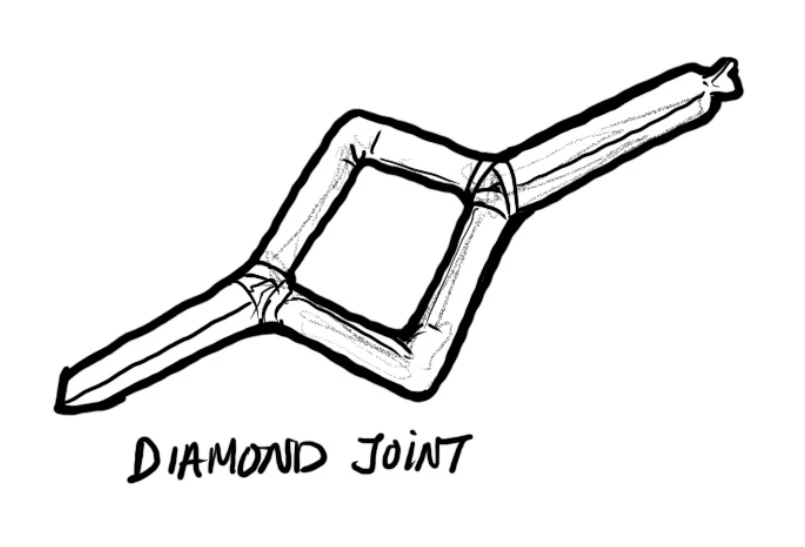
The Diamond Joint
OK, here’s where it starts to get really complicated.
The Diamond joint is a visually stunning bit of cannabis construction that splits in the middle to create a diamond shape. It’s going to take little practice and a lot of patience, but few joints have the impact of this beast.
The first step is to roll three joints. And we’re going to recommend you use king size rolling papers for each of them.
First, roll a fatty with a filter or crutch at one end. This is going to form the two ends of the diamond, so don’t hold back. When you’ve finished, cut that joint in half with a razor blade.
Then, roll two thin joints with filters. These two are going to form the diamond and connect to the ends of the joint you just cut, so you want these each to be about half the size of the main jay you rolled. Also, try not to roll these joints too tight as you have to be able to manipulate them a bit to create the shape we want.
Once you have everything rolled, grab about 10 more rolling papers and remove the glue strips. You are going to need these to lash all of your joints into place.
We have arrived at the tough part; it’s time to put them all together. Let’s start with the crutch end.
Begin by placing your joints on a flat surface and gathering some of those extra glue strips. Place the ends of the two slim joints tightly against the crutch side of the main tube, with the two slim joints angled at about 45 degrees to form a “V” shape. Now use a couple of the extra glue-lined strips to begin to bandage the joints together, braiding the strips in and out and around all three of the joints and working to make sure there are no visible gaps.
Don’t worry if this takes several of your glue strips. It is supposed to. Just keep lashing the joints together until everything is tight and secure.
Once done, it’s time to very gently bend your slim joints in the middle and aim them back toward the center, forming the diamond shape. This bend is why it is important to not roll these slim joints too tightly.
Finally, repeat the bandaging step using the other half of your fat joint and the remainder of your extra glue strips. Don’t feel obligated to use all 10 of the glue strips. We just recommend having that many ready in case you need them.
When complete, the Diamond joint is true marvel of cannabis engineering. It’s a bit of a mess to smoke once the cherry burns down to the two slim spoke-joints, but honestly, that’s not a bad problem to have, really.
For an easier method, try using a DaySavers King size cone or premium smoking tube instead of rolling the fat center joint. For an even easier, though less spectacular version, don’t cut the main, fat joint in half. Instead, simply lash one end of the diamond to the end of your joint and then use the glue strips to hold the other ends together. This will still be a diamond joint, but will have the diamond on the end instead of the middle.
Then just fire up the non-filter end and strap in for the ride.
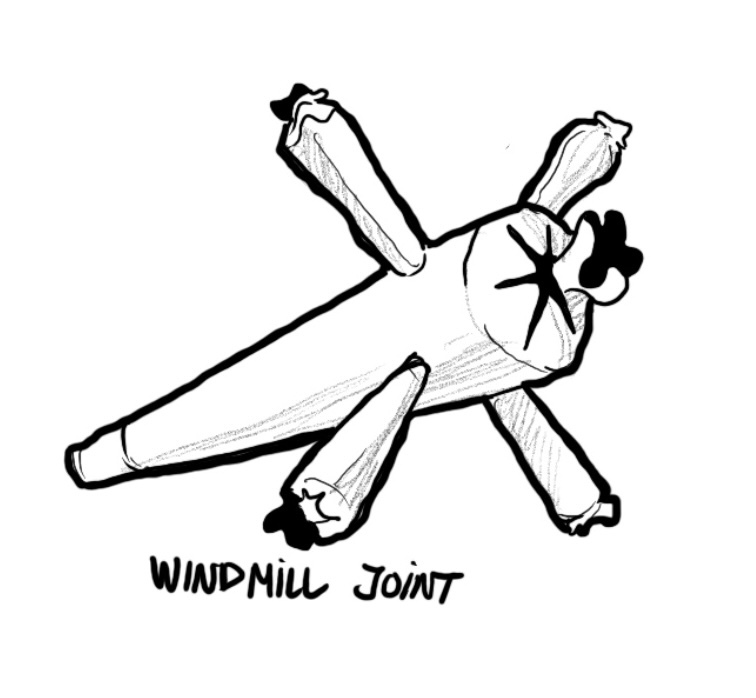
The Windmill Joint
We saved this one for last because it is one of the the most impressive and complicated bits of cannabis engineering we’ve seen.
Essentially, rolling the Windmill joint is a like making a giant four-pronged crutch/cooling chamber that you can then use as a platform to smoke four joints at the same time. Plus, once built, it can be used multiple times.
For this one you are going to need some card stock, like some index cards, for example.
Begin by creating a cone out of a piece of your card stock. If using index cards, we recommend rolling it from the short side instead of the long one. Once you have your cone shape, tape it together. You can use rolling paper glue strips here if you’d like, but since we don’t plan on smoking this card stock, you can just use scotch tape if you want.
Once taped, trim the excess index card from the wide end.
Now set that aside and grab two more index cards. Some tutorials will tell you that this is the place to wrap your cone with paper, twisting the top to seal it, but that’s actually going to make a step down the road a little harder, so we’re going to hold on that for now.
Next, roll two long, thin pipes and again, tape them down so they hold their shape. Once you’ve got these, get a pair of scissors or a box cutter and cut a small air hole out of one side in the middle of each of these pipes. But be careful to make sure your air holes are not wider than your cone.
OK, now we’re ready to begin the construction phase.
The first step in putting the Windmill together is poking holes through your cone so you can slide your pipes through. Use your scissors, box cutter or even something like the bamboo skewer you used for the Plumber’s Joint to poke holes through the cone. Set up the holes so that they are perpendicular, but remember to offset them so you can push your pipes all the way through both holes.
Once your holes are poked, this is where we recommend wrapping your cone with rolling paper. Seal two kingsize papers together to create a double-sized rolling paper and then just wrap your cone in the papers. It’s going to overhang the top of the cone, but that’s exactly what you want. Grab that extra paper and twist it together. This creates the top of your chamber.
Now re-poke your holes through the rolling paper.
The reason we recommend waiting to wrap your cone until after you poke the holes is because your paper might slip and/or poking the holes may distort the shape of your cone and it is easier to make adjustments without the rolling paper added on. Plus, poking a hole in rolling paper is incredibly easy.
Once your holes are poked and your cone is sealed, push your pipes through their holes. Make sure your air holes are in the center of your cone and not blocking each other. When complete, use some of the extra glue strips to seal the holes around your pipes to create airtight joints.
And that’s it, the windmill is built. Now you can roll four joints and place them in/on the ends of your pipes.
Or, pick up some DaySavers cones pack them up and simply use them to complete the Windmill Joint. Start with the mini dogwalker cones if you can. Remember, you’re smoking four at once...
And again, you can use the windmill itself multiple times, so don’t toss it our when you’re done!
And there you have it: Six unusual joints that you can roll to impress your friends! Let us know which ones you try, how they work for you, and any tips you might have to help others reach this next level of joint-rolling mastery!
And brush up on your cross cone joint history and cross cone rolling skills while you’re at it, you can never have too much exposure.
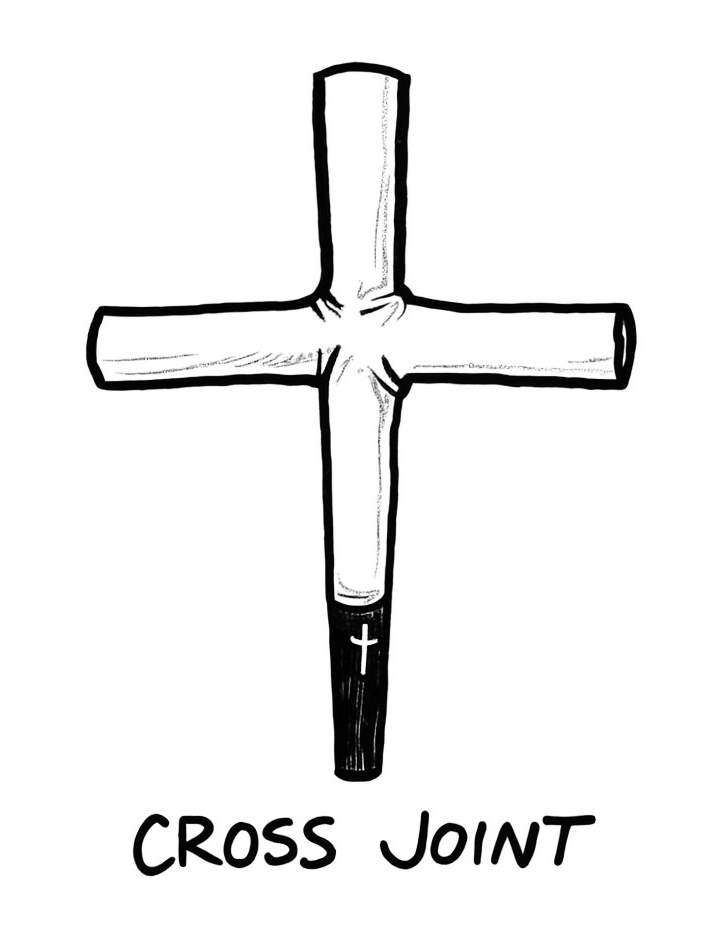
The Cross Joint
We cover how to roll a Cross Cone in detail in a previous article, but let's take a brief look at these wicked party-pleasers.
Rolling a Cross Joint starts by making two joints: one fat and one slim. The biegger joint is the main body, so roll it larger than usual, making sure it’s packed firm enough to support the weight of another joint passing through it.
Next, roll a thinner joint that will act as the cross-joint. Try to keep it straight, slim, and sealed at both ends, skipping the crutch on this one.
After both joints have been rolled, use a skewer to poke a hole through the body joint about 23/4 of the way up, refully widening the hole just enough to slide the slim joint through without tearing the paper.
Then, poke a smaller hole straight through the middle of the slim joint to allow airflow between both chambers. Gently insert the slim joint through the fat one, making sure the holes line up inside for proper ventilation. Use glue strips from extra papers to seal the intersection where the joints meet, wrapping them diagonally to create an airtight connection.
Finally, light all three ends at the same time and enjoy the show. Want the look without the effort? Just grab a Smoke Temple Cross Cone and get right to the good part.
It’s time, let’s learn about artful roles of the classic joint. We explore 6 unusual joints that you can roll to impress your friends!