


How to Pack a Pre-Rolled Cone: A Step-by-Step Guide
Posted by DaySavers Team on Oct 23rd 2023
There may not be a more accessible way in the recreational market to consume cannabis than prerolls. Pre-Rolls are the fastest-growing segment of the industry and the No. 1 add-on at dispensaries across the country.
The consumer no longer needs to search YouTube videos on how to roll themselves. Instead, the perfect joint can be purchased and consumed within minutes! Yet, that last statement touches on why we’re here today. Perfect. How do we produce the best prerolls every time?
A lot goes into the perfect preroll. The proper paper selection, how fine we grind our flowers, how we pack our cones, and the tips and tricks along the way. It can be easy to get overwhelmed by the topic.
Fear not. Let’s discuss the best strategies and go step-by-step on creating the perfect pre-roll joint.
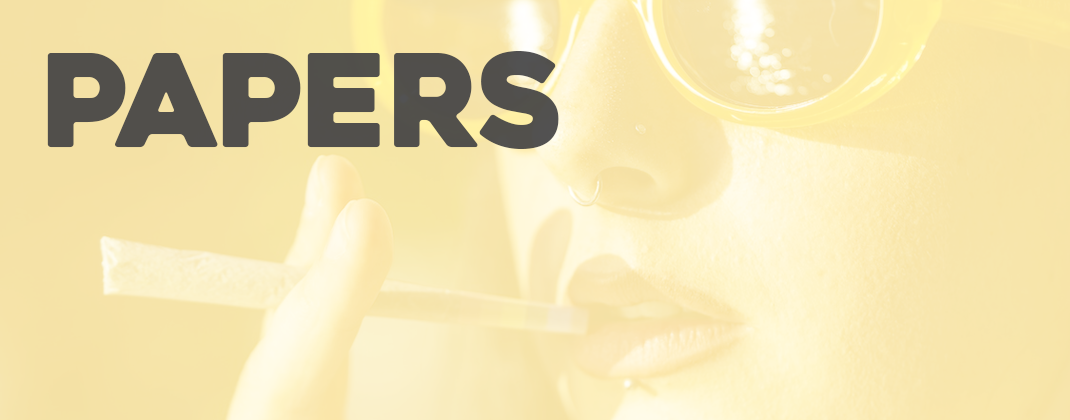
Step 1: Selecting Pre-Roll Papers and Cones
One of the most difficult aspects of hand-rolling a joint is the “tuck and roll” technique that seals in the cannabis, including ensuring a proper, straight seal to help the joint burn evenly.
Pre-roll cones take the guesswork out of this part, coming pre-formed into the perfect shape and pre-sealed so they don’t need to be rolled and moistened at all by the consumer.
When it comes to the world of pre-roll cones, the choices begin before the flower itself. The foundation of a great pre-roll begins with the right choice of paper and cone size, as these elements can significantly impact the quality and experience of your pre-roll. This section will delve deeper into these essential considerations, allowing you to make informed choices to pack a pre-rolled cone.
Exploring Paper Types
The type of paper you select is crucial in determining your pre-roll flavor, strength, and overall smoking experience. Here are some of the standard paper types to consider:
- Classic Rolling Papers: These are the traditional go-to choice for many cannabis enthusiasts. They are usually made from wood pulp and are often called “rice paper” because of their color and thinness, though they contain absolutely no rice, and offer a balanced burn. Classic rolling papers are known for preserving the flavor of the flower and providing a smooth smoking experience.
- Hemp Rolling Papers: As the name suggests, these papers are made from hemp fibers. They are environmentally friendly and offer a slightly earthier taste compared to other rolling papers. Hemp papers also tend to pack more punch than other papers, making them great for users who want extra strength in their joints.
- Flavored Papers: Flavored papers are worth exploring if you want to add a unique twist to your pre-roll. They come in various flavors, from fruity to herbal, enhancing the overall taste of your smoke through their smell interacting with your taste receptors.
- Natural Brown Papers: Natural Brown rolling papers are less processed than their refined white counterparts. Often called “unbleached,” this is a misnomer as white rolling papers also contain no bleach and are simply refined further to lose the slightly brownish color. The additional refinements also take out material that add to the taste of the papers, giving Natural Brown papers a little more flavor.
Choosing the Right Cone Size
Selecting the appropriate cone size is equally important when it comes to how to fill a pre-rolled cone. The size of your pre-roll cone can dictate how much cannabis you can pack into it, affecting your smoke's overall potency and duration. Standard cone sizes include:
- Half Gram Pre-rolls: 84mm pre-rolled cones are the go-to size for many pre-roll enthusiasts. It offers a balanced and moderate smoking experience, making it a versatile choice for various occasions.
- Slim Cones: For those who prefer milder smoke or want to conserve their cannabis, slim cones – also called “reefer cones” – are an excellent option. They're also great for solo sessions.
- King Size Cones: On the other end of the spectrum, king-size cones allow for a generous amount of cannabis. 109mm pre-rolled cone holds 1 gram but can fit up to 1.25 grams! This large size makes them suitable for sharing or for extended smoking sessions.
- Party Cones: As the name implies, party cones are the largest and perfect for group settings. They offer an abundant and communal smoking experience.
- Blunt Cones: For those who enjoy a blunt's extra power, you can always preroll a blunt tube like our Fill-A-Blunt packs!
- Mini Cones: DogWalker cones are 70mm and fit 0.25-0.35g of flower at a time, perfect for a small on-the-go session or a quick smoke!
- Pre-Rolled Tubes: If you don’t want to deal with papers you can always go with pre-rolled tubes, which can be as compact as a cigarette or hold up to 2 grams at a time.
Understanding the nuances of different paper types and cone sizes allows you to tailor your pre-roll to match your preferences and the occasion and is an essential step in learning how to pack a pre-rolled cone. Whether aiming for a quick solo smoke or a long and relaxed group session, making the right choices at this stage is critical to crafting the perfect pre-roll.
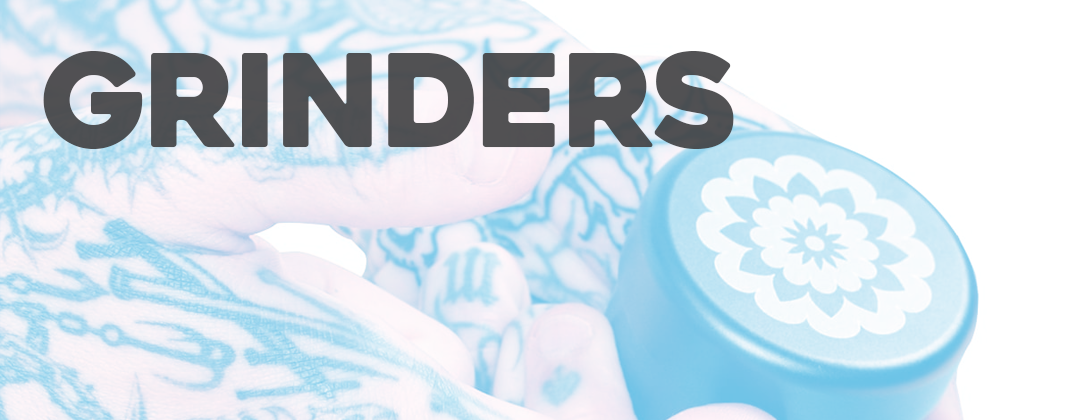
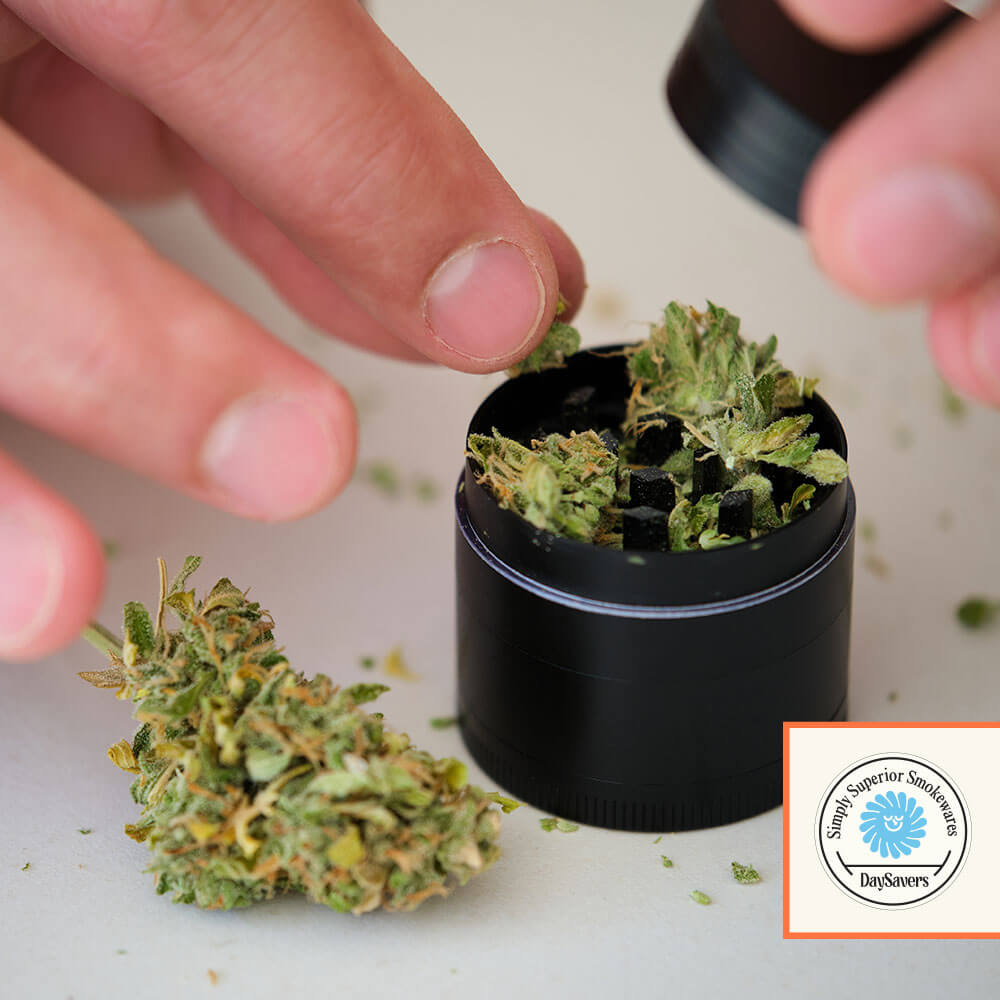
Step 2: Grind Your Flower
Now that we’ve gotten our cones taken care of, it’s time to handle our cannabis. Grinding is an imperative part of the process; do not skip over it! You’ll gain significant benefits from grinding your flower correctly every time.
If you’re picking apart your cannabis with your fingers or kitchen utensils your cannabis may be in too big of chunks to properly burn, which may waste some of your precious flower! Worse yet, it may even canoe your roll. So investing in a simple grinder is key to a perfect pre-roll.
The opposite of this is a problem, too, however, as grinding your flower too small can make for a harsh session if it’s packed too loose, as you’re taking in more paper than cannabis. Packing too tight may constrict the airflow of your preroll, resulting in poor draws and lackluster hits.
For these reasons, consistent grinding is paramount to ensure a pleasurable experience once your session comes to fruition. No one likes to have their pre-roll canoe, or, even worse, not be able to get a good drag. So take some extra time to grind your flower just right!
Step 3: How to Pack a Pre-Rolled Cone
Papers and grinding are taken care of, now it’s time to learn how to fill a pre-rolled cone! Packing can be an arduous process, but it doesn’t need to be!
The best course of action when packing your preroll is to use tools to pack little by little. You can buy packing pokers at most smoke shops, but there are other options if you can’t get your hands on a poker. You can use household items like chopsticks, tweezers, disposable straws or even a pen! What’s most important isn’t the tool you’re using but ensuring you’re packing correctly.
You can also consider tapping your pre-roll on a flat surface while packing, as this helps pack your cannabis. It’s extremely important to ensure we pack just the right amount, as packing too thoroughly can lead to poor pulling, and packing too loose will give you a harsh pull. So this make some practice.
Tips and Tricks for Packing Your Pre-Roll
Just like anything in life, there are some tricks you can use to ensure an enjoyable rolling experience. Make sure you’re rolling on a rolling tray or any other flat surface, as you can collect ground flowers from it and scoop them directly into your pre-roll cone.
Need help packing your cone? Fold a piece of paper in half and it becomes the perfect scoop to help pour your ground cannabis into its cone.
Once you’re finished packing, it’s time to finish your joint by twisting it. One last tip is to hold your cone by the end and swing your joint back and forth to use centripetal force to help pack your joint tighter. Once completed, you can twist the tip of your cone to ensure your pre-roll is fully packed.
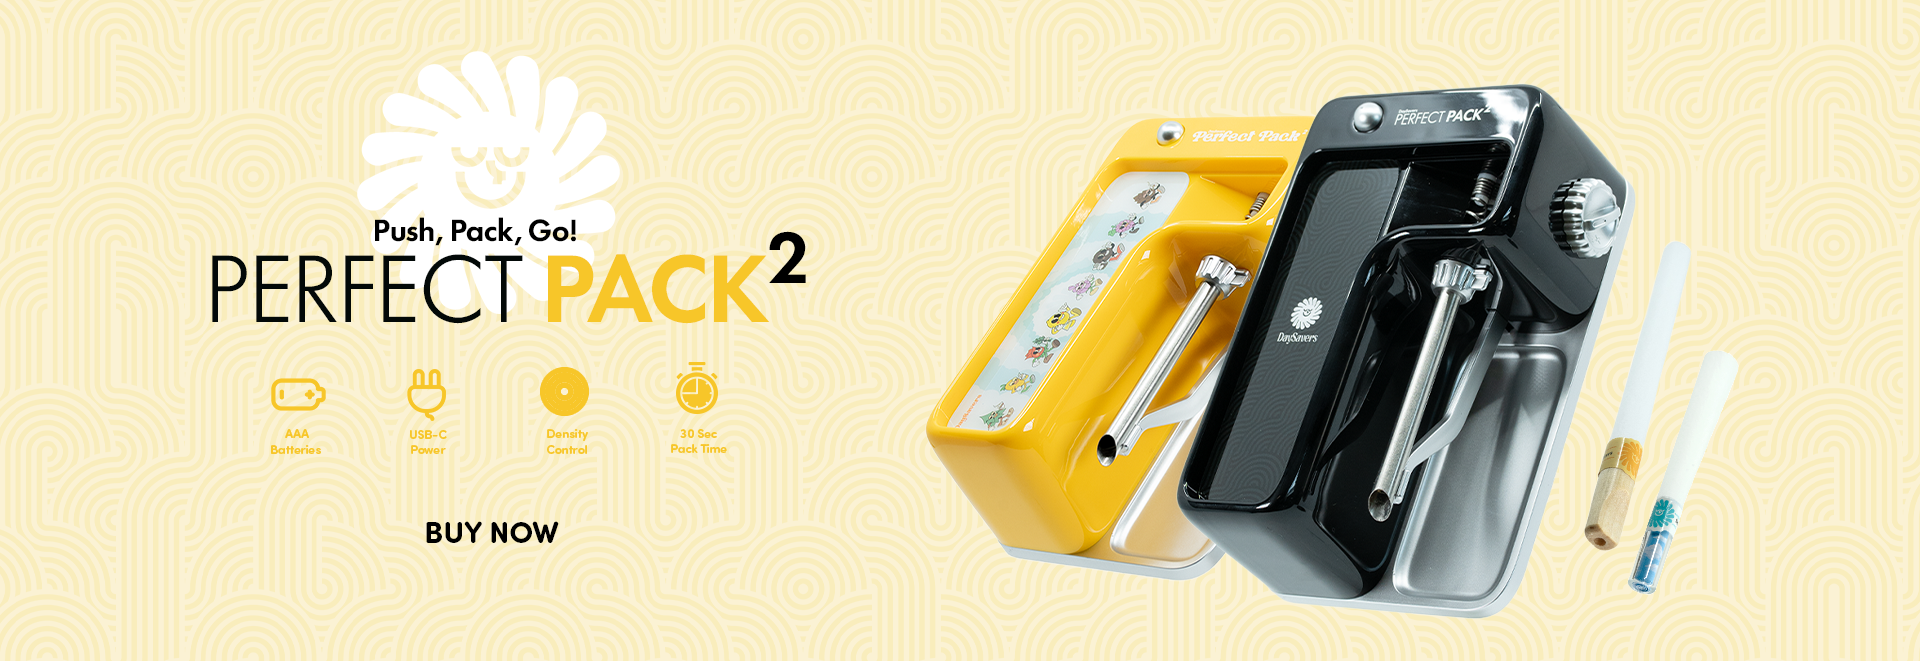
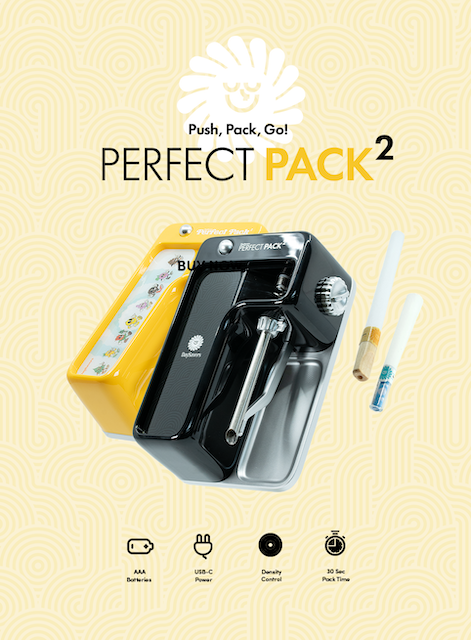
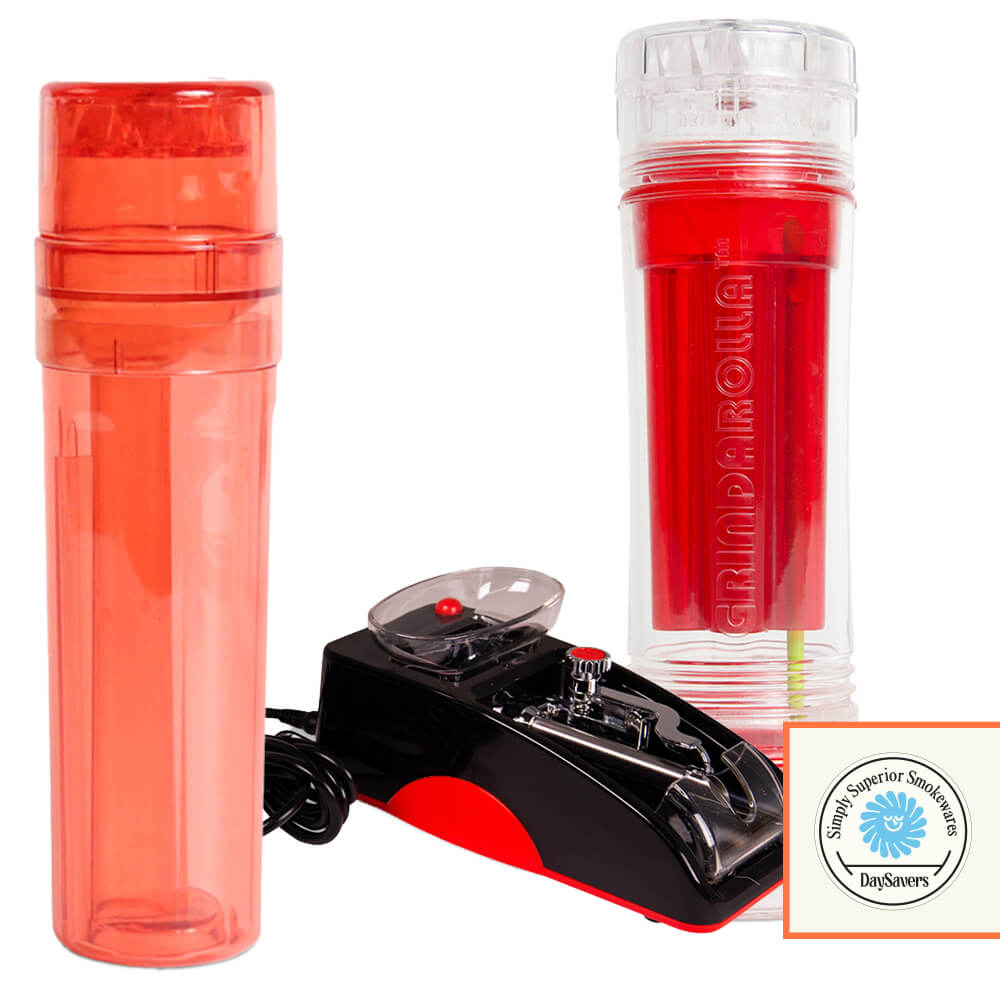
Different Cone Filling Devices
We know that packing your prerolls can get old and troublesome. Sometimes, you just want to finish it and enjoy your flower in record time. Luckily, some devices allow you the speed of a professional packer without the hassle. Let’s break down four of them to see if they’re right for you:
- The Perfect Pack is the signature device for filling pre-roll cones and tubes! With the capability of packing up to 5 cones per minute, it’s perfect to fill your cones quickly and easily. All you need to do is load your ground flower, slide in your chosen cone, and let the machine work its magic!
- The Flower Tower offers both grinding and pre-roll packing on the go! A grinder, chute, and cone holder all in one, the Flower Tower uses magnetic closure mechanisms to ensure you’ll never lose a milligram of flower when preparing your next pre-roll. All you need to do is remove the grinder and chute pieces, slide in your 84mm cone, and get off to the races with an enjoyable session!
- The Fast Fill Rolling Tray is a hybrid rolling tray and cone-filler designed to make packing pre-rolled cones fast and easy. It features foldable legs, built-in cone funnels, and includes tools like a brush and packing stick to streamline the process. With interchangeable funnels for both King Size and 1¼ half-gram cones, it’s a convenient solution for any pre-roll enthusiast.
- A Simple Cone Funnel goes a long way in packing your pre-rolls. If you’re tired of scooping up your flower you can simply funnel it into your papers by packing in between each step.
No matter how you prepare your prerolls it all comes down to packing it correctly. But if you’re looking into pre-rolls because you want to save time compared to traditional joint rolling, these devices may be the perfect way to get your smoke on in record time.
Step 4: Finish the Joint
The most important part of the pre-roll experience is here, and it’s finishing your beautiful joint! If you’re smoking your pre-roll right away, there’s no need to twist up your joint, you can simply fill it to the top with flowers and start your session.
If you’re saving your pre-rolls for later you’ll have a hard decision in front of you. Whether to finish your cannabis with a twist or a Dutch crown, let’s get into the difference.
Twisting Your Joint
Twisting your joint's end is the most simple and commonly used method to finish a pre-roll. It is simple enough: you just twist any excess paper at the end of your pre-roll to create a closed end. It also provides a “wick-like finish” that you can light to ensure an even smoke.
The pros of this choice show themselves as it’s incredibly time efficient, creates a secure seal, and helps compact your flower. The cons of twisting are that it can come unraveled quickly if not taken care of, it can accumulate ash in small cavities and it has the potential for uneven burning if twisted too tightly.
But don’t twist your joint too tight, or it will result in an over-packed joint, affecting airflow.
Dutch Crown
To finish your joint with a Dutch Crown, you want excess paper, about 1.25cm’s worth. Gently fold this excess inward, ensuring it covers the joint's opening tip. This should create the “crown” shape. Once folded, gently twist the ground shape and hold the paper. If any excess paper is sticking out, you can carefully tuck it under the crown.
The pros of the Dutch Crown are its aesthetics of the fine finish. Additionally, the inward folds at the tip of your joint help to prevent scooby snacks (or cannabis/ash particles entering the joint on pull and finding their way in your mouth). Dutch Crowns can also help improve airflow on pulls by keeping the paper straighter.
Cons of the Dutch Crown finish include executing it correctly can be difficult, so it’ll take practice before you do it right. With experience comes perfection; until then, your joint may be less compact than if you were to twist it, resulting in harsh pulls.
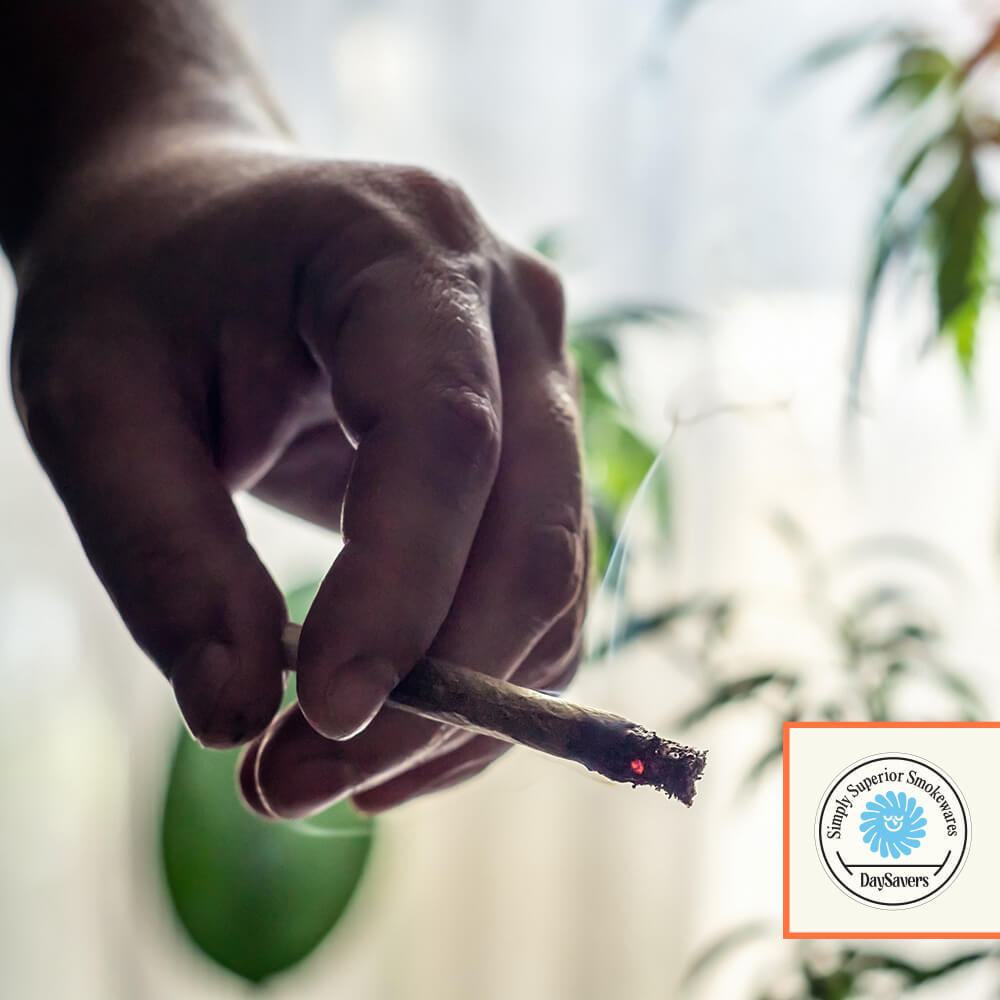
Step 5: Light Your Pre-roll
Last but certainly not least in this process is lighting your joint. Although it seems simple, lighting your joint correctly is a must to avoid canoeing your beautiful pre-roll.
You want to use a reliable and functional lighter to ensure you light your joint correctly. Consider “toasting” the tip of the joint by holding the flame to the tip without inhaling. This step dries the paper and ensures an even burn. Rotate the joint to heat the entire circumference of the tip. Once the tip is toasted, take a gentle and even draw while applying the flame. Make sure the entire circumference of the tip is ignited. As you inhale and light the joint, rotate it to ensure an even burn across the entire circumference.
Try not to rush the lighting process, as an incorrect light can mean the difference between a great session and wasted cannabis.
Lighters vs. Matches vs. Hemp Wicks
Lighters
Lighters are a convenient and widely available option for lighting your joint. They offer an adjustable flame, allowing you to control the intensity, and are more wind-resistant, making them suitable for outdoor use. They are also reusable and can be refillable, which can be cost-effective in the long run. However, some lighters may initially produce a slight butane taste, and users should be cautious not to inhale butane fumes while lighting.
Matches
Matches provide a natural, butane-free way to light your joint, so there's no risk of introducing a butane taste to your smoke. They are also environmentally friendly, especially when using wooden matches. However, matches are not wind-resistant and require sheltered conditions to be effective. They are consumable and may run out quickly, which can be inconvenient. Lighting a joint with matches also takes some skill to achieve and maintain an even burn.
Hemp Wick
Hemp wick, made from hemp and beeswax, offers a clean, flavor-neutral option for lighting your joint. It delivers a slow and controlled burn, making it easy to light the joint evenly. Hemp wick reduces the risk of inhaling butane fumes, which can be a concern with lighters. However, igniting requires an additional flame source, such as a lighter or matches.
Hemp wick is less widely available than lighters or matches, so you may need to plan ahead to have it on hand. Its benefits include both a clean taste and controlled ignition but come with the requirement of an extra ignition source.
Step 6: Enjoy your Pre-roll!
All that’s left to do is to enjoy your pre-roll! Rolling joints and blunts yourself can take a tremendous amount of time, especially when rolling multiple for special occasions. In situations like these, taking advantage of pre-rolls cones is the perfect remedy!
No matter what paper you use, how you pack your pre-roll, or how you light your joint you’re now on your way to the session with half the time needed to roll yourself! We’ll call that a definite win.
Discover the secrets to crafting the perfect pre-roll cannabis cone with our comprehensive guide. From choosing the right paper to mastering the twist or Dutch crown, we'll walk you through every step. Elevate your cannabis enjoyment today!